This is a long post about overcoming some challenges I had with a recent network install. It should have been pretty straightforward but instead I hit a couple of speed bumps that caused it to take much longer than I expected.
Last year I moved for the first time in 24 years, and the new place presented some challenges. One big upside is that it has gigabit fiber, which is a massive improvement over my last place.
The last place, however, had a crawl space and I was able to run Ethernet cable pretty much everywhere it was needed. The new place is a post and beam house (think “ski lodge”) which doesn’t lend itself well to pulling cable, so I needed a wireless solution.
I used to use Ubiquiti gear, and it is quite nice, but It had a couple of downsides. You had to install controller software on a personal device for ease of configuration, and I kind of soured on the company with how it dealt with GPL compliance issues and in disclosing the scale of a security incident. I wanted to check out other options for the new place.
I looked on Wirecutter for their mesh network recommendations and they suggested the ASUS ZenWifi product for gigbit fiber networks, and I ended up buying several nodes. You can connect each node via cable if you want, but there is a dedicated 5 GHz network for backhaul between the nodes for wireless communication, which is what I needed.
There were a couple of issues with the stock firmware, specifically that it didn’t support dynamic DNS for my registrar (the awesome Namecheap) and it also didn’t support SNMP, which is a must have for me. Luckily I found the Merlin project, specifically the gnuton group which makes an open source firmware (with binary blobs for the proprietary bits) for my device with the features I need and more.
[Note: As I write this there is a CVE that ASUS has addressed that has not be patched in gnuton. It’s frustrating as I’ve had to close down NAT for now and the fix is taking some time. I tried to join the team’s Discord channel but you have to be approved and my approval has been in queue for a week now (sigh). Still love the project, though.]
Anyway, while I had some stability issues initially (I am still a monitoring nerd so I was constantly observing the state of the network) those seem to have gone away in the last few months and the system has been rock-solid.
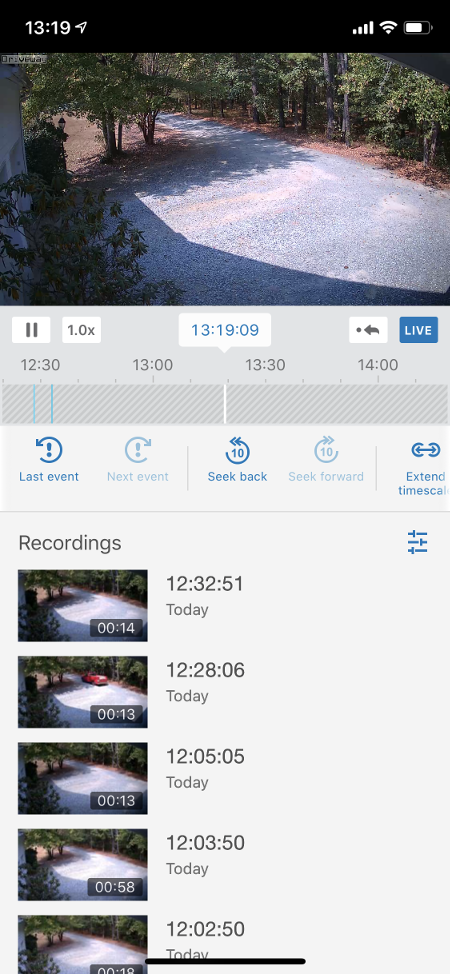
The new farm is nice but there were no outbuildings, so we ended up building a barn. The barn is about 200m from the house, and I wanted to get internet access out there. We live in a dead zone for mobile wireless access so if you are in the barn you are basically cut off, and it would be nice to be able to connect to things like cameras and smart switches.
For a variety of reasons running a cable wasn’t an option, so I started looking for some sort of wireless bridge. I found a great article on Ars Technica on just such a solution, and ended up going with their recommendation of the TP-Link CPE-210, 2.4 GHz version. It has a maximum throughput of 100Mbps but that is more than sufficient for the barn.
I bought these back in December and they were $40 each (you’ll need two) but I just recently got around to installing them.
You configure one as the access point (AP) and one as the client. It doesn’t really matter which is which but I put the access point on the house side. Note that the “quick setup” has an option called “bridge mode” which is exactly what I want to create, a bridge, but that means something different in TP-Link-speak so stick with the AP/Client configuration.
I plugged the first unit into my old Netgear GS110TP switch, but even though it has PoE ports it is not able to drive the CPE-210, so I ended up using the included PoE injector. I simply followed the instructions: I set the IP addresses on each unit to ones I can access from my LAN, I created a separate, wireless network for the bridge, and with the units sitting about a meter apart I was able to plug a laptop on the client side and get internet access.
Now I wanted to be able to extend my mesh network out to the barn, so I bought another ASUS node. The one I got was actually version 2 of the hardware and even though it has the same model number (AX-6600) the software is different enough that gnuton doesn’t support it. From what I can tell this shouldn’t make a difference in the mesh since it will just be a remote node, but I made sure to update the ASUS firmware in any case. The software has a totally different packaging system, which just seems weird to me since the model number didn’t change. I plugged it in and made sure it was connected to my AiMesh network.
I was worried that alignment might be a problem, so I bought a powerful little laser pointer and figured I could use that to help align the radios as I could aim it from one to another.
I had assumed the TP-Link hardware could be directly mounted on the wall, but it is designed to be tie-wrapped to a pole. I don’t have any poles, so it was once again off to Amazon to buy two small masts that I could use for the installation.
Now with everything ready, I started the install. I placed the AP right outside of my office window, which has a clear line of sight to the hayloft window off the barn.

I mounted the Client unit on the side of the barn window, and ran the Ethernet cable down through the ceiling into the tack room.

The tack room is climate controlled and I figured it would be the best place for electronics. The Ethernet cable went into the PoE injector, and I plugged the ASUS ZenWiFi node into the LAN port on the same device. I then crossed my fingers and went back to my desk to test everything.
Yay! I could ping the AP, the Client and the ASUS node. Preparation has it’s benefits.
Or does it?
When I went back to the barn to test out the connection, I could connect to the wireless SSID just fine, but then it would immediately drop. The light on the unit, which should be white, was glowing yellow indicating an issue. I ended up taking the unit back to the house to troubleshoot.
It took me about 90 minutes to figure out the issue. The ASUS device has four ports on the back. Three switched LAN ports and a single WAN port. On the primary unit the WAN port is used to connect to the gigbit fiber device provided by my ISP. What I didn’t realize is that you also use the WAN port if you want to use a cabled backhaul versus the 5GHz wireless network. While not a wired connection per se, I needed to plug the bridge into the blue WAN port versus the yellow LAN port I was using. The difference is about a centimeter yet it cost me an hour and a half.
Everything is a physical layer problem. (sigh)
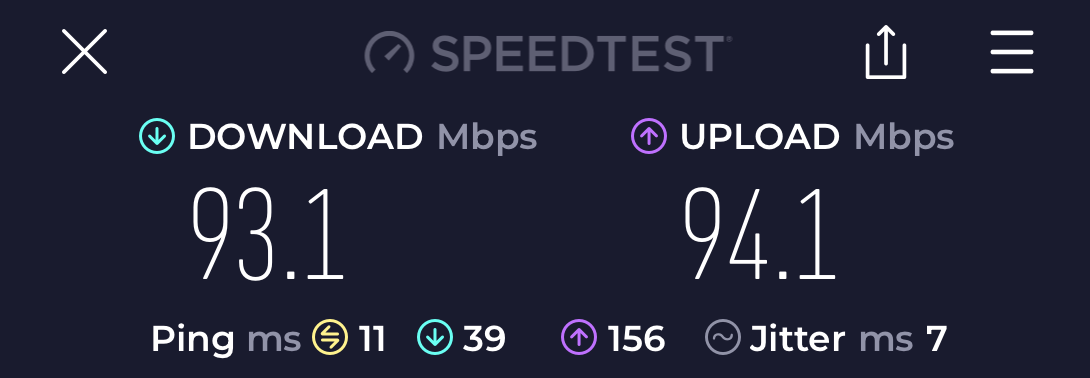
Once I did that I was golden. I used the laser pointer to make sure I was as aligned as I could be, but it really wasn’t necessary as these devices are meant to span kilometers. My 0.2km run was nothing, and the connection doesn’t require a lot of accuracy. I did a speed test and got really close to the 100Mbps promised.
So I was golden, right?
Nope.
I live so remote that I have an open guest network. There is no way my neighbors would ever come close enough to pick up my signal, and I just think it is easier to tell visitors just to connect without having to give them a password. Most modern phones support calling over WiFi and with mobile wireless service being so weak here my guests can get access easily.
We often have people in the barn so I wanted to make sure that they could have access as well, but when I tested it out it the guest network wouldn’t work. You could connect to the network but it would never assign an IP address.
(sigh)
More research turned out that ASUS uses VLAN tagging to route guest traffic over the network. Something along the way must be gobbling up those packets.
I found what looked like a promising post covering just that issue with the CPE-210, but changing the configuration didn’t work for me.
Finally it dawned on me what the problem must be. Remember that old Netgear switch I mentioned above? I had plugged the bridge into that switch instead of directly into the ASUS. I did this because I thought I could drive it off the switch without using a PoE injector. When I swapped cables around to connect the bridge directly to the AiMesh node, everything started working as it should.
Success! I guess the switch was messing up the protocol just enough to cause the guest network to fail.
If at least one of my three readers has made it this far, I want to point out that several things here made it difficult to pinpoint the problem. When I initially brought up the bridge I could ping the ASUS remote node reliably, so it was hard to diagnose that it was plugged into the wrong port. When the Netgear switch was causing issues with the guest network, the main, password protected SSID worked fine. Had either of these things not worked I doubt it would have taken me so long to figure out the issues.
I am very happy with how it all turned out. I was able to connect the Gree mini-split HVAC unit in the tack room to the network for remote control, and I added TP-Link “kasa” smart switches so we could turn on and off the stall fans from Homekit. I’m sure the next time we have people out here working they will appreciate the access.
Anyway, hope this proves helpful for someone else, and be sure to check out the CPE-210 if you have a similar need.