CarbonROM Install on Pixel XL (marlin)

I am still playing around with alternate ROMs for Android devices, and I recently came across CarbonROM. I had some issues getting it installed (more due to me than the ROM itself) and so I thought I’d post my steps here.

I was looking for a ROM that focused on stability and security, and Carbon seems to fit the bill.

While I have a lot of experience playing with ROMs, I hadn’t really done it on handsets with “Seamless Update“. In this case there are two “slots”, Slot A and Slot B, and this can cause a challenge when installing a new operating system. This procedure worked for me (with help from Christian Oder via the CarbonROM community on Google+).

  1. Install latest 8.1 Factory Image

    This may not be required, but since I ran into issues I went ahead and installed the latest “oreo” factory image. I had already upgraded the phone to Android 9 (pie) and thought that might have caused the problems I was having, but I don’t think that was the case.

  2. Unlock the bootloader

    This is not meant to be a tutorial installing alternative ROMs, but basically you go to Settings -> System and then locate the build number. Click on that a number of times until you have enabled “developer mode” then go to the developer options and unlock the bootloader and enable the ability to access the device over USB. Then boot into the bootloader and run “fastboot flashing unlock” and follow the prompts on the screen.

  3. Boot to TWRP using image

    In order to install an alternative ROM it helps to have a better Recovery than stock. I really like TWRP and pretty much just followed the instructions. Using the Android Debugger (adb) you boot into the bootloader and run TWRP from an image file.

  4. Install TWRP zip

    Once you are running TWRP, install it into the boot partition from the .zip file. Use “adb push” to put the .zip file on the /sdcard/ partition.

  5. Reboot to Recovery (to make sure TWRP still works)
  6. Factory reset and erase /system

    Go to “Wipe” and do a factory reset, and then “Advanced Wipe” to nuke the system partition.

    You will also want to erase user data at this point. Once I got Carbon to boot it still asked me for a password which I assumed was the one I set up in the original factory install (you have to get into the factory image to unlock the bootloader). I went back and erased all of the user data and that did what I expected, so you might want to do this at this step.

  7. Install Carbon

    Use “adb push” to send the latest Carbon zip file to the /sdcard/. Install using TWRP.

    This is the point where my issues started. The next step is to reboot back into recovery. You have to do this so that the other Slot gets overwritten with the new operating system. However, with the Carbon install TWRP was overwritten and that hung the device when I tried to reboot into recovery, so

  8. Re-install TWRP

    Use “adb push” to load the TWRP .zip file again and install it while you are still in TWRP, then

  9. Reboot to recovery

    This should get Carbon all happy on your device as it will be copied over into the other Slot. If you try to boot into the system before doing this bad things will happen. (grin)

  10. Install GApps (optional)

    Now, if you want Google applications you need to install a GApps package. I like Open GApps and so I installed the “pico” package. One thing I am experimenting with here is seeing if I can use a minimal amount of Google software without giving Google my entire digital life. The pico package includes just enough to run the Google Play Store.

    This is optional, and if you just want to run, say, F-Droid apps, you can skip this step, but note I’ve been told that you can’t add GApps later, so if you want it, install it now.

  11. Reboot into the System

If everything went well, you should see the Carbon boot screen and eventually get dropped into the “Welcome to Android” Google sign up wizard. Follow the prompts (I turn off almost everything but location services) and then you should be running CarbonROM with a minimal amount of Google-ness.

The first thing I tried out was “Pokémon Go“. Due to people cheating by spoofing their GPS coordinates, Pokémon Go leverages features of Android to detect if people are running an altered operating system. I’ve found that on some ROMs the application will not work. It worked fine on Carbon and so I’m hoping I can add just a few more “Google” things, like Maps, and then use F-Droid for everything else.

Note that I didn’t “root” my operating system. When you boot into TWRP you can access the entire device with root privileges so I never feel the need to have root while I’m running the device. Seems to be a good security practice and it also allows me to still run Pokémon Go.

Many thanks to the CarbonROM team for working on this. I’m eager to see how soon security updates are released as well as what they do with Android 9, but it looks promising.

Android Open Source Frustrations

I used to be a huge fan of Apple products, but as they started to lock down their ecosystem the limitations they created started to bother me, so I switched to running as much open source as possible.

It wasn’t, and isn’t always now, easy. One of the gripes I still have against Apple is that their commercial success has spawned a ton of imitators who have decided to lock down their products, quite often without the Apple savvy to back it up. Unfortunately, Google seems to be joining these ranks.

I’m a fan of Google, they do a lot to support open source, and I use a Nexus 6 as my primary “hand terminal” (handy). However, I run alternative software on it, namely OmniROM, which gives me more control over my experience and security.

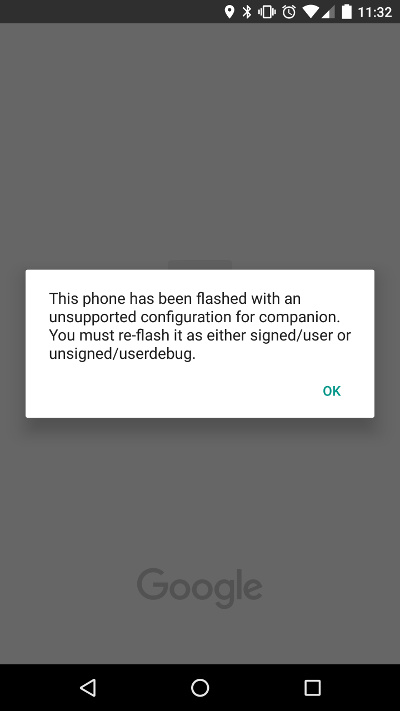
I pretty much run open source software on all my technology with few exceptions, one being my Android Wear watch. I noticed that there was a new update to Android Wear (version 2.0) so I went to play with it. When I launched the app I got this screen:

Android Wear App Error

(sigh)

So I went off to search for a solution to the error message “This phone has been flashed with an unsupported configuration for companion. you must re-flash it as either signed/user or unsigned/userdebug”. I found a couple of answers that suggested I edit the build.prop file and change

ro.build.type=userdebug

to

ro.build.type=user

In order to do this, you have to have root access to your phone.

(sigh)

I do root my phone, but I haven’t done it in awhile because Google has introduced this thing called “SafetyNet“. The stated purpose is to prevent malware but in practice what it does is torpedo people like me who actually want to control the software on the devices they own. If you install a custom ROM or have root access, certain applications will not run.

Now I have to choose between running the Android Wear app or, say, Pokémon Go. I chose Android Wear (I pretty much finished Pokémon Go).

The process: Boot into recovery, install SuperSU, boot into system, use a file editor to edit /system/build.prop and change ro.build.type from “userdebug” to “user”, reboot.

Android Wear Mute

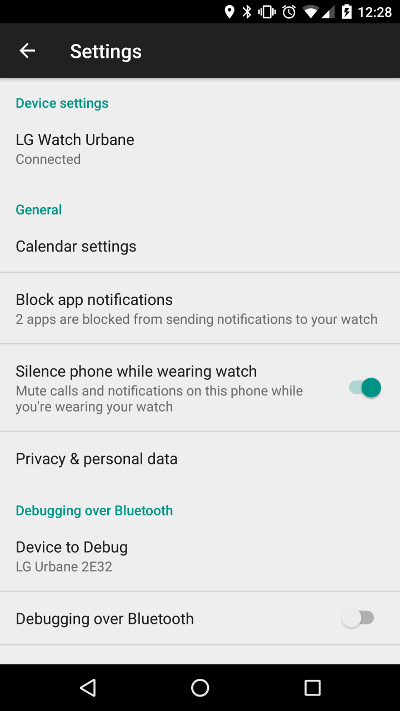
So Android Wear will start now, but to add to the frustration the one feature I hoped they would fix is still broken for me. It used to be that if my watch was actively paired with the phone, it would mute ringing and other audio notifications. It doesn’t (and none of the fixes I’ve found work for me) so now I just remember to decrease the volume on the phone down to “vibrate”.

Pokemon Go Blocks root

And, I verified that Pokémon Go will not start now – it hangs on the login screen and then reports an error. This is whether or not SuperSU is enabled, and I think I would have to remove it entirely to get it to work.

Now I know that I can install other apps that will hide the fact that my phone is rooted, but if I do that the terrorists win. I would just rather use apps that don’t force me to give up my rights.

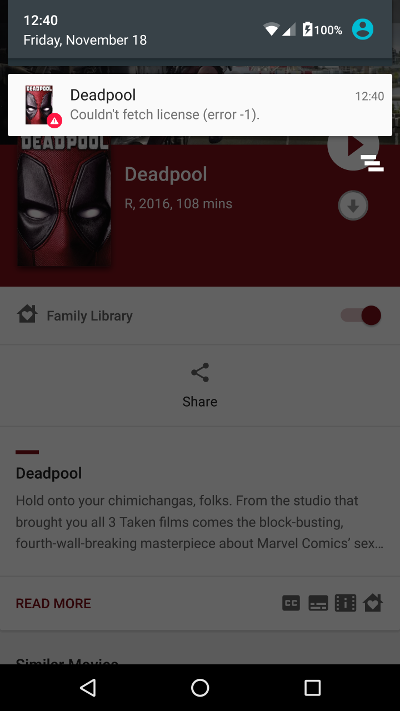
Which brings me to the last frustration. I purchased a bunch of content from Google, but now I can’t access it on this phone. I get “couldn’t fetch license”. This started recently so I believe it has something to do with SafetyNet, but repeated calls to Google Play support yielded no answers.

Google License Error - Deadpool

I have a Google 6P that is stock and doesn’t suffer from the download issue, so it stands to reason that there is some “protection” in place that is preventing me from accessing the content I purchased. I solved the problem by not buying content from Google Play anymore.

I’m pretty certain that it is only going to get worse. Google used to be much better about such things but I think they want to emulate Apple in more ways than one (see the new Pixel phone if you don’t believe me) and that is a shame for all of us.

UPDATE: I found a better way to do this that doesn’t require root. Assuming you have a custom recovery like TWRP, you can simply boot into recovery and then connect the handy to a computer. Using “adb shell” you can then access the system directory and edit the build.prop file directly.

OmniROM 6.0

For the last few days it has been hard to remain true to my free and open source roots. I guess I’ve been spoiled lately with almost everything I try out “just working”, but it wasn’t so with my upgrade to OmniROM 6.0 on my Nexus 6 (shamu).

I’ve been a big fan of OmniROM since it came out, and I base my phone purchases on what handsets are officially supported. While I tend not to rush to upgrade to the latest and greatest, once the official nightlies switched to Android “Marshmallow” I decided to make the jump.

Now there are a couple of tools that I can’t live without when playing with my phone. They are the Team Win Recovery Project (TWRP) and Titanium Backup. The first lets you create easy to restore complete backups and the latter allows you to restore application status even if you factory reset your device, which I had to do.

[NOTE: I should also mention that I rely on Chainfire’s SuperSU for root. It took me awhile to find a link for it I trust.]

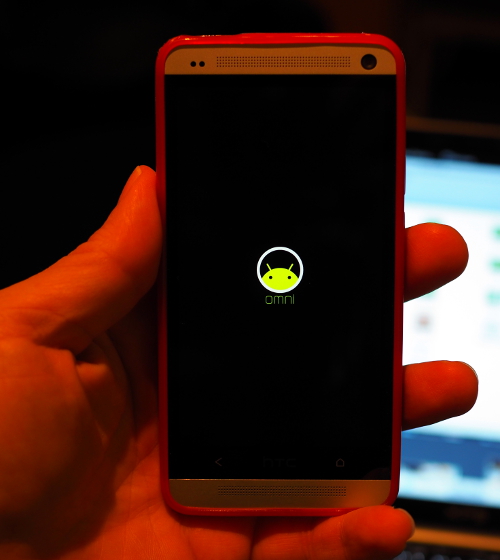
When I tried the first 6.0 nightlies, all I did was sideload the ROM, wipe the caches, and reboot. I liked the new “OMNI” splash screen but once the phone booted, the error “Unfortunately process com.android.phone has stopped” popped up and couldn’t be cleared. Some investigation suggested a factory reset would fix the issue, but since I didn’t want to go through the hassle of restoring all of my applications I decided to just restore OmniROM 5.1 and wait to see if a later build would fix it.

Well, this weekend we got a dose of winter weather and I ended up home bound for several days, so I decided to give it another shot. I sideloaded the latest 6.0 nightly and sure enough, the same error occurred. So I did a factory reset and, voilà, the problem went away.

Now all I had to do was reload all 100+ apps. (sigh)

I started by installing the “pico” GApps package from Open GApps and in case you were wondering, the Nexus 6 uses a 32-bit ARM processor.

I guess I really shouldn’t complain, as doing a fresh install once in awhile can clean out a bunch of kruft that I’ve installed over the past year or so, but I’ve come expect OmniROM upgrades to be pretty easy.

One of the first things I installed from the Play store was the “K-9 Mail” application. Unfortunately, it kept having problems connecting to my personal mail server (the work one was fine). The sync would error with “SocketTimeoutException: fai”. So I rebooted back to Omni 5.1 and things seemed to work okay (although I did see that error when trying to sync some of the folders). Back I went to 6.0 (see where TWRP would come in handy here?) and I noticed that when I disabled Wi-Fi, it worked fine.

As I was trying to sleep last night it hit me – I bet it has something to do with IPv6. We use true IPv6 at the office, but not to our external corporate mail server, which would explain why a server in the office would fail but the other one work. At home I’m on Centurylink DSL and they don’t offer it (well, they offer 6rd which is IPv6 encapsulated over IPv4 but not only is it not “true” IPv6 you have to pay extra for a static IP to get it to work). I use a Hurricane Electric tunnel and apparently Marshmallow utilizes a different IPv6 stack and thus has issues trying to retrieve data from my mail server when using that protocol.

(sigh)

I tried turning off IPv6 on Android. It’s not easy and I couldn’t get any of the suggestions to work. Then I found a post that suggested it was the MTU, so I reduced the MTU to 1280 and still no love.

So I turned off the HE tunnel. Bam! K-9 started working fine.

For now I’ve just decided to leave IPv6 off. While I think we need to migrate there sooner rather than later, there is nothing I absolutely have to have IPv6 for at the moment and I think as bandwidth increases, having to tunnel will start to cause performance issues. Normal traffic, such as using rsync, seems to be faster without IPv6.

That experience cost me about two days, but at the moment I’m running the latest OmniROM and I’m pretty happy with it. The one open issue I have is that the AOSP keyboard crashes if you try to swipe (gesture type) but I just installed the Google Keyboard and now it works without issue.

I have to say that there were some moments when I was very close to installing the Google factory image back on my Nexus 6. It’s funny, but the ability to shake the phone to dismiss an alarm is kind of a critical app with me. Since the last time I checked it wasn’t an available option on the Google ROM, I was willing to stick it out a little longer and figure out my issues with OmniROM.

Heh, freedom.

First Look at Ubuntu Gnome 15.10

Back when I was an Apple fanboy, I would eagerly await the announcement of new products by Steve Jobs, with one window open to the live blog feed and the other refreshing the Apple Store page so I could be the first to order the new shiny. Steve Jobs made me fall in love with my technology.

I’ve rarely felt that since, but when the new Dell XPS 13 came out I became once again attached to a laptop and I was determined to make it work under Linux.

While it ships with the latest stable Ubuntu release, 14.04, there are issues. Now I often say that we in the open source community suffer an embarrassment of riches when it comes to choice. Since I’ve found that Linux Mint with Cinnamon works best for me I tried it, but I just could not get it to work with the XPS. To address the shortcomings in Ubuntu 14.04, I read Barton’s Blog and decided to upgrade to 15.04. That addressed a lot of the problems, and I used Ubuntu with Unity for awhile, and although Unity was my first real Linux desktop it doesn’t work as well for me anymore. I also found that its HiDPI support was not quite there. I also tried Kubuntu but its HiDPI support (in my experience) was even worse, and since I’d based my laptop I figured I’d give Ubuntu Gnome a shot.

Now I wasn’t one of those haters who just ranted on Gnome 3.0, but when it came out I couldn’t get used to it. However, when I went to install Ubuntu Gnome on the XPS, I was encouraged that the installer recognized out of the box that I was on a HiDPI screen. There have been a lot of changes since that initial release and I found myself warming to it.

I do want to note that while I found all the desktop options I tried to be pleasantly polished, and, well, “pretty”, I decided to stick with Ubuntu Gnome.

A pesky issue with the touchpad and the touch screen required the 4.1 kernel or later. For months I’ve been running mainline kernels, so when 15.10 was announced with the 4.2 kernel standard, I was eager for the upgrade, and I ran it as soon as it became available.

So what does 15.10 offer? All I can really say at the moment is that it offers a pretty painless upgrade process. I ran “do-release-upgrade -d” and after answering a few prompts it went on its merry way.

Wireless worked out of the box (I used to have to futz with the Broadcom driver when on mainline) and overall the system seemed to be pretty smooth. During the boot process I get this error concerning lvmetad which I think is due to the fact that my entire laptop disk is encrypted, but the boot completes without any other issue and I have confidence it will soon be addressed.

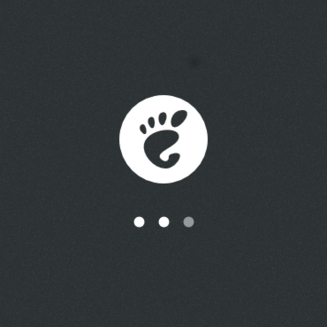
Speaking of boot, Ubuntu Gnome has changed the logo on the boot screen. Instead of the familiar foot:

Old Ubuntu Gnome Logo

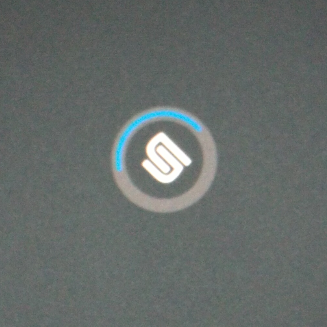
You get this new one:

New Ubuntu Gnome Logo

Forgive the quality as I had to produce the second image by taking a picture of the screen. While I like that the colors have been softened from black to a gray, I don’t like the new logo, which looks like two U’s mating. I think it is supposed to represent “UG” but I still don’t like it (and I tend to embrace change). I’m hoping someone puts together a splash screen replacement.

The only real issue that is driving me bonkers at the moment concerns the touchpad. One thing Apple just nailed is the touchpad and the Synaptics one on the XPS is oh so close.

The problem I’m experiencing concerns the cursor jumping when I left click. There are no “real” buttons, so you left click by depressing the lower left corner of the touchpad (or clickpad, whatever it is officially called). Sometimes when this happens, instead of registering a click the cursor will jump to the lower left corner of the screen, and *then* click. It is real annoying in Thunderbird since the icon in the lower left corner puts it in offline mode.

I’ve tried most of the suggestions I’ve found in the t00bz but nothing has helped. I just found a reference to HorizHysteresis and VertHysteresis so I’ll play with those values and see if it helps (update – doesn’t seem to). Not quite sure what they do, however. I think the issue has something to do with a finger from my right hand still grazing the touchpad surface when I make the click.

On the upside, the palm detection issues I was dealing with seem to be improved. Not sure if they have been solved but I’m not noticing it as much. Could be that I’ve just modified my typing form to avoid the touchpad better.

Overall, I’m pretty pleased with the upgrade. It should set up a nice base for the next LTS release, 16.04. I’m not quite willing to give up Linux Mint on the desktop just yet, and I’ll probably try out Mint 18 when it is released next year, but Ubuntu Gnome 15.10 has at least made switching a possibility.

One final note, I like the new shiny and I’m willing to put up with a lot in order to play with it. I give money to Dell to encourage them to supply more Linux offerings, but the downside is that Dell leads with devices designed for Windows first. If you want a true Linux experience with zero issues, check out the offerings from System 76. Our Sable all-in-one desktops Just Worked™.

Okay, so that wasn’t the final note. While I doubt any of my three readers work for major laptop vendors, I really want to see a push for physical kill switches on things like the camera and the microphone, such as on the Librem 15. I considered getting one of those but they are a little sketchy on what “PureOS” actually is, and so I’ll wait to see what others think of it first.

Solution for One Trackpad Issue for the XPS 13

My new laptop is the beautiful new Dell XPS 13 running Ubuntu Gnome 15.04.

It is not perfect, but it is getting close. Lightweight, beautiful screen and awesome battery life (nearly 8 hours the way I use it).

One thing that was killing me, though, was that after a certain amount of time (on the order of tens of minutes and not hours), the trackpad/clickpad thingie would start misbehaving under Gnome Shell, registering bogus clicks. There wasn’t an easy way to fix it outside of a) reboot or b) use an external mouse.

It seems that this issue has been addressed in the 4.1 kernel, so I decided to try it. I’m not sure if Ubuntu is going to support the 4 kernel series officially before 15.10 so I didn’t want to wait.

I downloaded the 4.1.1 kernel here (you’ll need three debs: the “all” headers deb and the image and headers debs for your CPU – I used “generic” and “amd64”), installed them with “sudo dpkg -i” and rebooted. The problem seems to be fixed.

But, my Broadcom wireless driver wouldn’t work. I had to download one more deb from here (via my phone – never play with kernels when you are on a long road trip), install it and now wireless is back.

Now if we could just get palm detection fixed …

Review: Dell XPS 13 (9343) Ubuntu Edition

Okay. When it comes to tech, I want the latest and greatest. To me, the “greatest” must include as much open software as possible. As an ex-Apple user, I want the same experience I used to get with that gear, but with free and open source software.

It can be hard. Rarely is the open source world involved in new hardware decisions by the major vendors, so we learn about new devices after the fact. Thus there is an inevitable delay between when a product is announced and when it properly works with FOSS.

Such was the case with the new XPS 13 laptop from Dell.

Now, I vote with my wallet, so back in 2012 when I needed a laptop I bought the second edition “Sputnik” Dell XPS 13, which shipped with Ubuntu. It served me well for many years and currently runs Linux Mint 17.1 with no problems. When the latest edition XPS 13 was announced, I immediately ordered it, but it didn’t work out so well.

When I discovered that the other option from Dell, the M3800, wasn’t for me, I decided to wait until they officially supported Ubuntu on the new XPS 13. I didn’t have to wait long, and I placed my order the day I learned it was available (I was happy to learn that they had to fix some kernel-level issues and it wasn’t just me).

Why didn’t I wait longer? The XPS 13 is gorgeous. I haven’t felt this strongly about a laptop since my 12-inch Powerbook back in 2013. Others seem to agree, with even Forbes praising this machine.

Anyway, the order process was simple. I got the XPS 13 with the i7 processor, 8GB of RAM, 512GB SSD and the HiDPI touchscreen. The laptop arrived about a week before it was scheduled. Go Dell.

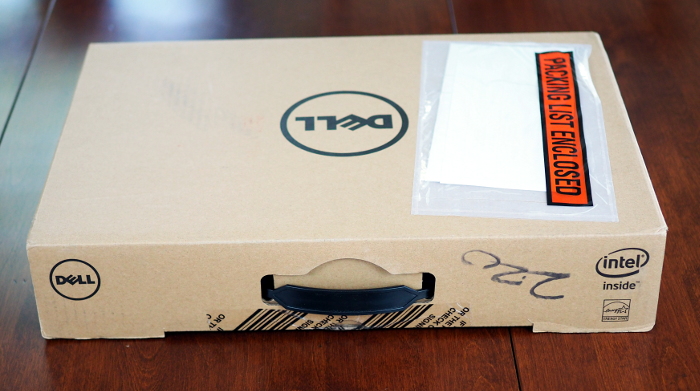
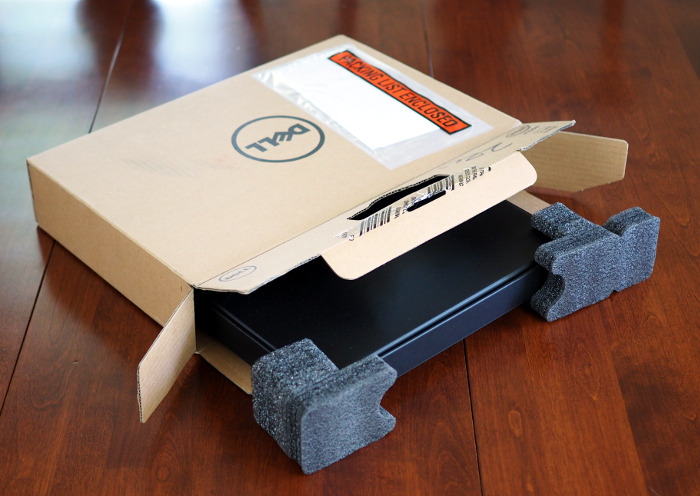
Now for the obligatory unboxing pictures. The outer box arrived undamaged:

Dell XPS 13 Unboxing Pic 1

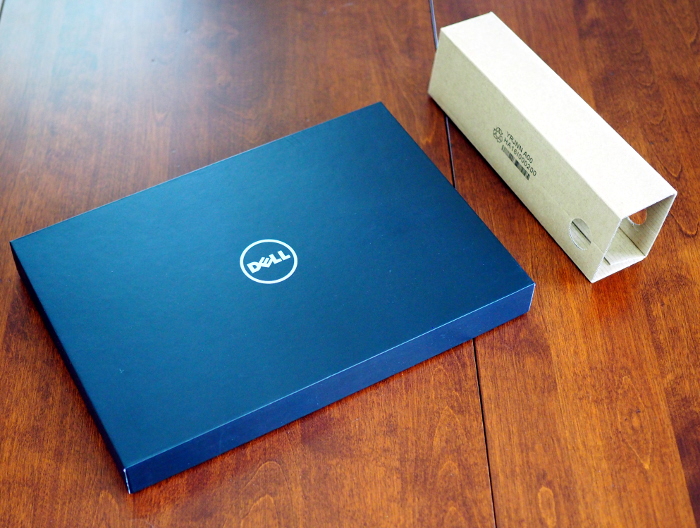
The laptop itself came in a separate box:

Dell XPS 13 Unboxing Pic 2

with the accessories shipped in a cardboard “square tube”:

Dell XPS 13 Unboxing Pic 3

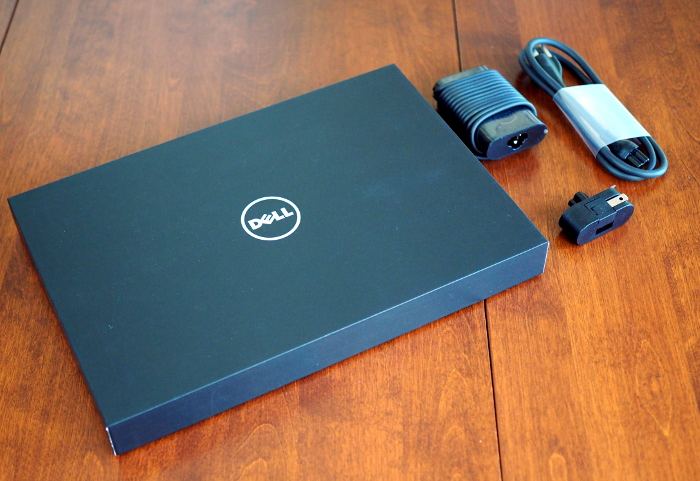
While the small power supply came with a longer power cable with a “mickey mouse” connector, the XPS 13 comes with a small adapter that gets rid of the cable entirely (like the Apple laptop power bricks).

Dell XPS 13 Unboxing Pic 4

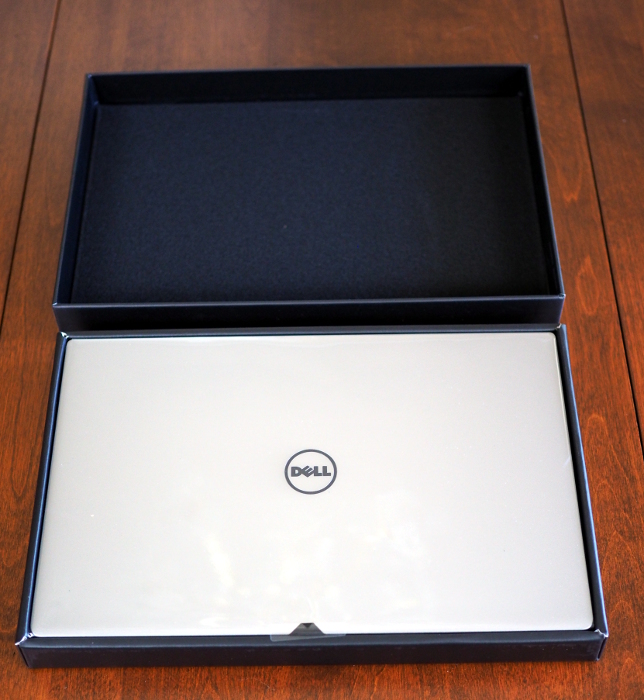
The laptop pretty much fills up its box:

Dell XPS 13 Unboxing Pic 5

Like with my original XPS, there is a cool little intro video that plays when you first start it up:

Please note that it only runs on the first start – you will not have to wait 40+ seconds to boot your system (usually less than 10).

The XPS 13 Ubuntu Developer Edition ships with 14.04, but I had some issues with it. First, it didn’t have the option for encrypting the home directory. I’m not sure how or why that got removed. The system also crashed when I attempted to make a backup image to a USB stick. Finally, there are apparently still outstanding issues with 14.04:

Ubuntu 14.04 includes kernel 3.13. The touchpad will run in PS2 mode and the soundcard will run in HDA mode. Currently (4/15) out of the box the HDA microphone will not work, and you will need some packages from the factory shipped image to make it work properly.

While I knew I was going to base the system, I logged in to the stock image to check out the apt repository. There really wasn’t anything outside of the vanilla Ubuntu (the few Dell packages seem to be just for recovery) so I felt fairly safe in reinstalling.

I immediately went to my default distro, Linux Mint 17.1, but found that a lot of things, especially the touchpad, didn’t work as expected. It did handle HiDPI screens just fine (you could actually see the mouse pointer increase in size when logging in). I figured I’d wait until 17.2 comes out and try it again.

On a side note, I don’t know why it is so hard to get a decent touchpad under Linux. We’re getting closer, but still, it tends to be the weakest point of the Linux laptop experience.

In search of a solution, I found Barton’s Blog and read the following:

With BIOS A00 or BIOS A01 the touchpad will run in I2C mode and the sound will not function. Please update to at least BIOS A02 and the touchpad will run in I2C mode and the sound in HDA mode. (4/15) All of the relevant patches have been backported and all functions will work out of the box.

I really liked the “will work out of the box” bit, so I installed Ubuntu 15.04.

It had been awhile since I’d used Unity, and it has really matured. I especially liked the little touches. When I changed my desktop background, the background of the Dock changed color to match it. Neat.

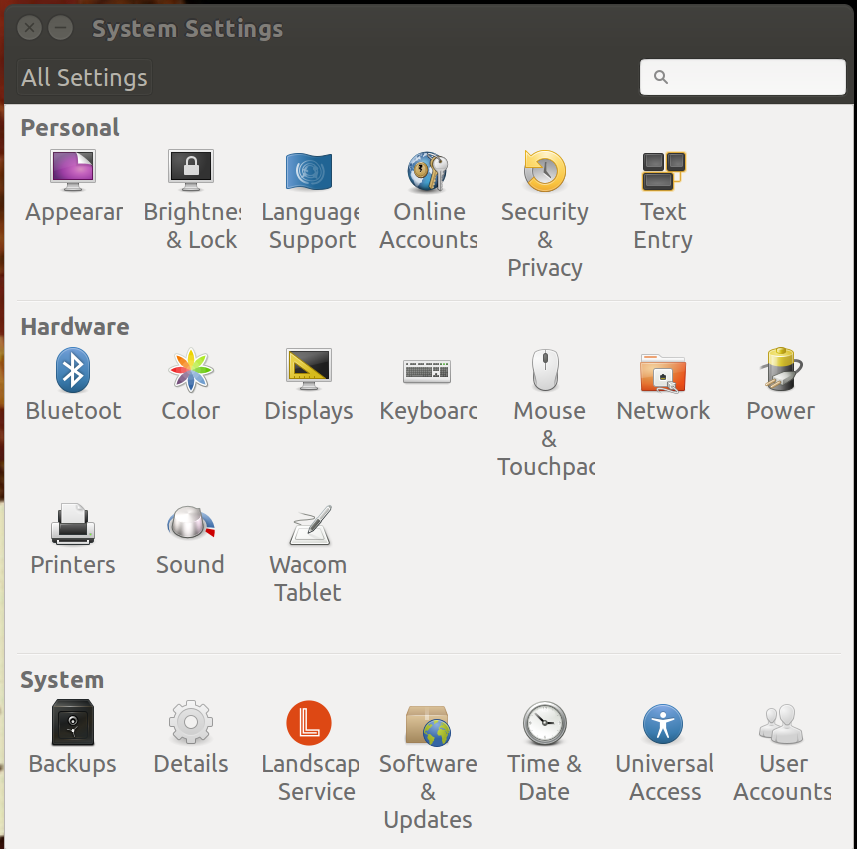
Where Unity still has some way to go is in HiDPI support. There is a scaling factor you can set, but it only applies to a small part of the UI. I still ended up having to customize many of my apps. For example, if you look at the settings page with scaling, a lot of the text under the icons are cropped:

Dell XPS 13 Ubuntu Text Cropped

Not a show stopper, and I used it for over a month without getting too annoyed.

Last week I saw that the release candidate for Mint 17.2 was out, so I dutifully backed up my Ubuntu install, based the system and installed Mint. Things seems to work better (although HiDPI support was not working by default), but I ran into a weird problem with trying to click and drag.

While everyone seems to deal with trackpads differently, the way I click and drag is to use the index finger of my left hand to click and hold the lower left corner of the trackpad, and then I use the index finger of my right hand to move the mouse pointer. This works fine under most desktop environments, but under Cinnamon it seems to interpret it as a right click (which usually causes a menu to drop down). If I just used a single finger to click on the window header and then move it, it worked as expected, but I couldn’t get used to it enough to continue to use it.

Oh well. I’ve posted a question on the Mint forums but no one has been able to help.

Anyhoos, since my system was based I decided to try out some other 15.04-based distros while I had the chance. I had heard great things about the new Plasma interface in KDE, so Kubuntu was next.

I can’t say much about Kubuntu since its HiDPI support is worse than Unity. Everything was so tiny I couldn’t spend much time in the UI. Oh well, what I saw was pretty.

And I should stress that this was a recurring theme in my experiments with desktop environments. Every UI I’ve tried has been beautiful and more than able to compete with, say, OS X.

By this point I decided to punt and just search on “Linux Desktop HiDPI”. Several of the results touted that Ubuntu Gnome was the best desktop to use for HiDPI systems. So, before going back to Unity I decided to give it a shot.

Wow.

I haven’t used Gnome 3 in awhile, but I was encouraged in that even the install process handled the HiDPI screen well. It has become really mature, and so far has provided by far the best experience with the XPS 13. I’ve had to do little to get it to work for me.

Is it flawless? No. There is an issue with the touchpad where it occasionally translates touches into click (kernel patch approved). If you sleep the system, the touchscreen will stop working (but you can reload its module). Sometimes, the system doesn’t sleep when you close the screen, which can cause the laptop to get really, really hot.

But these are minor issues and I expect them to be addressed in the near future. I am confident that I’ve found a great combination of software and hardware, and that it will only get better from here.

I have just a few more notes to share. The battery life is outstanding – I can get 6-7 hours of use without recharging. The “infinity screen” is beautiful and bright, but by having almost no bezel they had to move the camera to the lower left corner, which creates a slightly odd viewing angle.

Dell XPS 13 Camera Angle

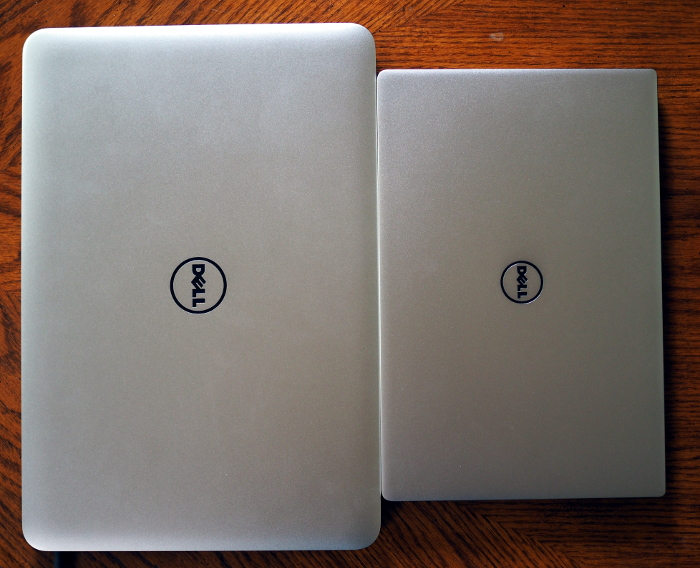
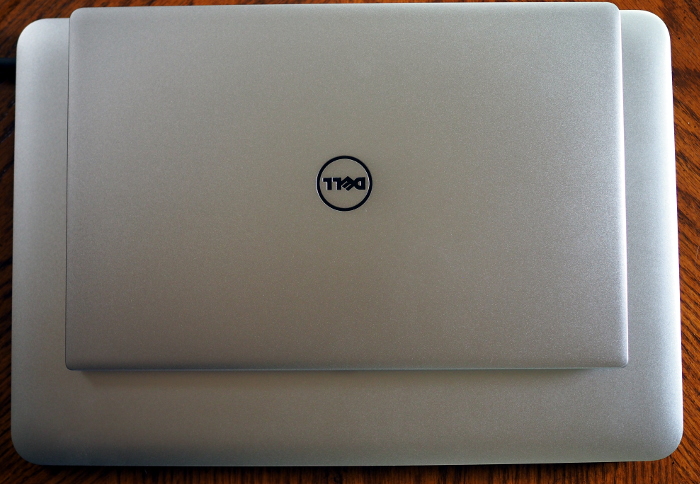
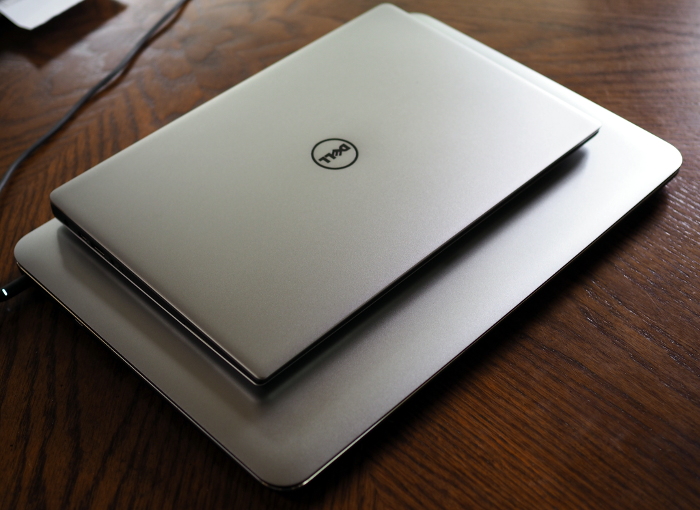
In closing, here are a couple of shots comparing the XPS 13 with the M3800.

Dell XPS 13 vs. M3800 Pic 1

Dell XPS 13 vs. M3800 Pic 2

Dell XPS 13 vs. M3800 Pic 3

Building an Open Source PVR: Step Three – Electronic Program Guide

The most frustrating thing about this project was getting the Electronic Program Guide (EPG) to work. Unfortunately, it isn’t easy.

This was one of the things that TiVo excels at doing. You are basically paying for a very up to date program guide. They also offered something called a “Season Pass” which would cause all of the episodes of a particular program to be recorded without having to explicitly select them.

When I got my EyeTV system, this part was a snap. They partner with TV Guide to provide the service, and unlike TiVo’s $14.95/month fee it is a yearly fee of $19.95 (with the first year being included with the unit).

Even my Sony Bravia is able to get over the air EPG information, but I wasn’t able to get that to work with OpenELEC.

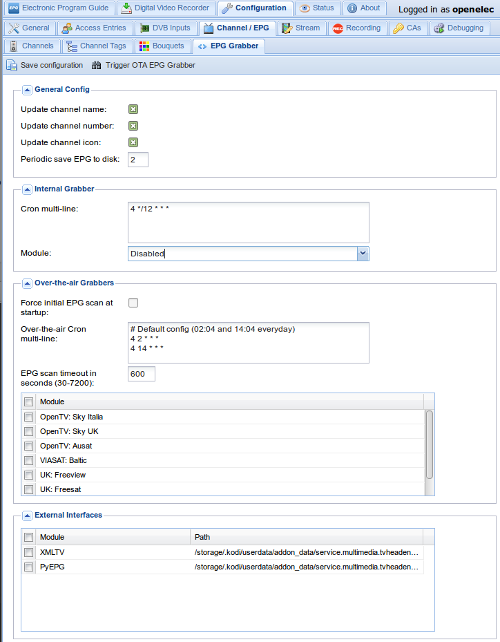
The actual EPG configuration occurs in the Tvheadend software. You get a screen like this:

There are three main areas of configuration: the “Internal Grabber”, “Over-the-air Grabbers” and “External Interfaces”.

The internal section displayed a cron job but no module options. None of the OTA grabbers seemed to work, and there wasn’t a module for North America. That left the external grabbers.

I started digging around and found that it really isn’t easy to get this running.

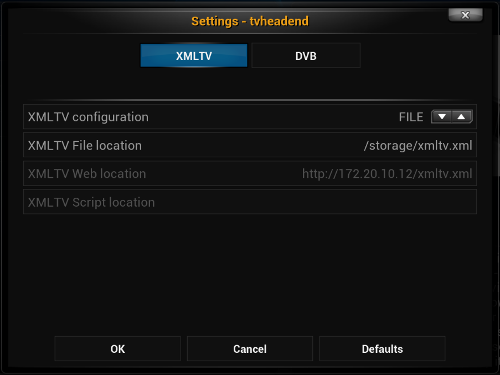
One tool that kept coming up was XMLTV. On the frontend configuration for the Tvheadend client in OpenELEC they even have a section on it:

XMLTV is a number of things, such as a format for representing TV listings, but it is mainly a set of tools “to obtain, manipulate, and search TV Listings”. It contains programs that will connect to an external source to gather EPG data.

Unfortunately, OpenELEC doesn’t ship with it. There is a script called “tv_grab_file” which is used to manage the XMLTV data, but not to actually acquire that data.

For me the easiest solution was to install XMLTV via apt on my home Debian server. It comes with a script called tv_grab_na_dd that can be used to fetch the data.

But I still wasn’t done. I needed a data source. It looks like all the cool kids use Schedules Direct. They are a non-profit that promotes open source software and provides, for a fee, access to EPG information. Since they had a free trial I signed up, configured my tv_grab_na_dd script to access their information, and voilà, I had an XML file with what appeared to be useful information.

I placed that in the webroot of my server, and then configured OpenELEC to point to it. Nothing happened. So I copied the file to the OpenELEC server, modified the client to use the “FILE” method (see screenshot above) and nothing happened.

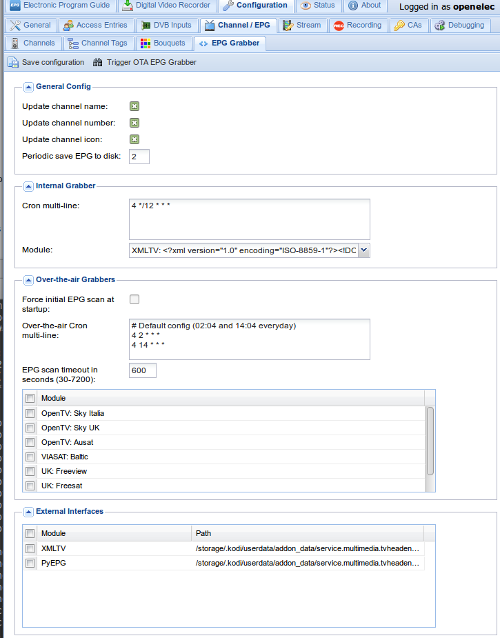
I finally had to uncheck the XMLTV checkbox under “External Interfaces”. When I did that I finally had something under the “Internal Grabbers” section.

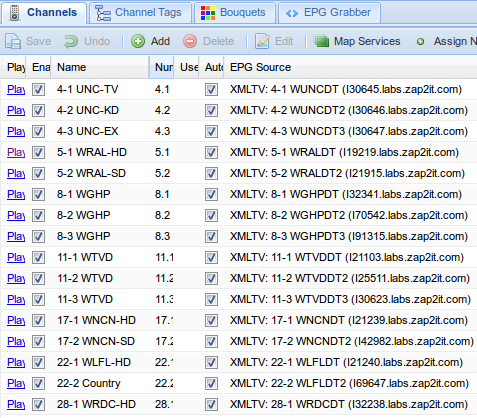
The last chore was to associate the channels I had discovered with the program guide.

Prior to getting all of that to work, the drop down for “EPG Source” had been blank.

So, to summarize my steps:

  1. Get an account at schedulesdirect.org
  2. Install the XMLTV tools somewhere (I used a Debian box)
  3. Configure XMLTV to access your Schedules Direct account
  4. Set up a cron job to periodically grab the updated EPG information and store it in a web root:
     0 1,13 * * * /usr/bin/tv_grab_na_dd --config-file ~/xmltv.conf --days 7 > /secure/html/xmltv.xml
    
  5. On the OpenELEC box, set up a cron to fetch the data:
    0 2,14 * * * wget http://172.20.10.12/xmltv.xml -O /storage/xmltv.xml
    

Whew. So far everything has been working well. You want to be sure not to fetch the data too often as that can overwhelm the Schedules Direct servers. My current seven day XML file is about 10MB.

I went ahead and signed up for a year account for $25, bringing my total to $705.92 (the hardware was $680.92 and the software was, yup, $0). It’s quite possible to shave off about $200 by going with less memory and a smaller SSD (or using an HDD) or if you already have a server to run the Tvheadend backend you could get by with a Raspberry Pi.

My next steps are to play with all the cool add-ons and to try and organize my pictures in a fashion where they would be usable with the system. More fun for me.

Building an Open Source PVR: Step Two – Software

So in my quest to replace my Mac-based PVR I wanted something lightweight that could be controlled via a remote. I had issues with my current setup when a keyboard or a mouse just had to be used, and I wanted to avoid that. Since this system would be dedicated to the PVR, I didn’t want to install anything that wasn’t necessary.

This left me two options: Kodi (formerly XBMC) and MythTV. I decided to try out Kodi via the OpenELEC project. OpenELEC aims to create a very lightweight instance of Kodi that can be installed (and probably even run) from a USB stick. Sounded like just want I needed.

The easiest way it install OpenELEC is to create a bootable install USB stick. This is pretty easy, if you read the instructions correctly. I actually spent a lot more time on this than I needed because of a failure to do so. Once you download the image you need (I used the new bundled “generic” version which works with Intel-based devices as well as most others), you insert your USB stick and then run the “create_livestick” command. You pass a parameter to that command which indicates the path to the USB stick, i.e. /dev/sdX where X is the drive letter.

This is where I screwed up. I could easily tell that the stick I used was mounted on /dev/sdh1, so that’s what I used. The problem was by adding the “1” I was specifying a partition and not the whole drive. It took me an embarrassingly long time to figure out what I was doing wrong.

Once the stick was created, I just booted the Intel NUC with it and followed the on-screen instructions. Pretty soon I had a working OpenELEC system.

Now let me stress that OpenELEC is not designed as a dedicated video recorder. It is designed to run Kodi which is a media center, so most of its functions are aimed at managing libraries of media and not recording television. The menu is organized by media type:

You have a Pictures menu, and if you have the PVR add-ons installed, a TV menu item. Videos are movies, whereas TV Shows are media files that have been identified as TV Shows (different than things you have recorded on your PVR).
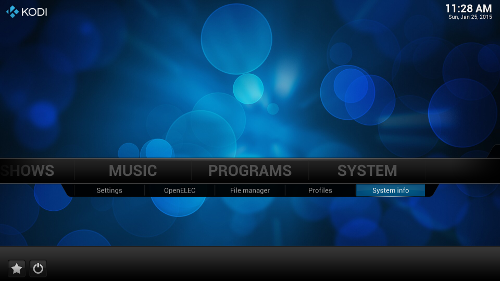
Then you have your Music files, any Programs you have added to the system (as in software programs) and the System menu itself.
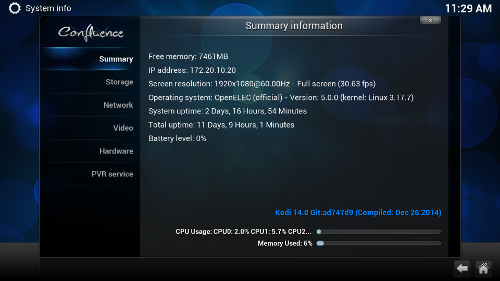
The system information screen gives you a read-only overview of the system, including memory usage and frames per second.

To actually change things you need to go to the configuration menu:
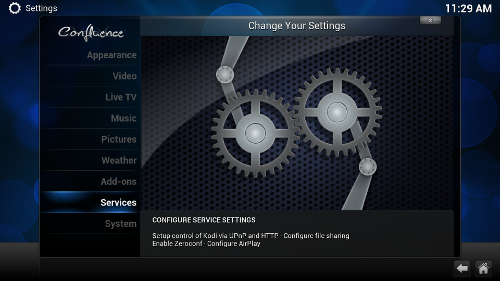
You can add media sources via pretty much every network protocol currently in use. As I have a couple of UPnP servers on my home network I used that format, but I found that when I added new content the system wouldn’t pick up the changes. So I installed an add-on to update my library but it didn’t help:
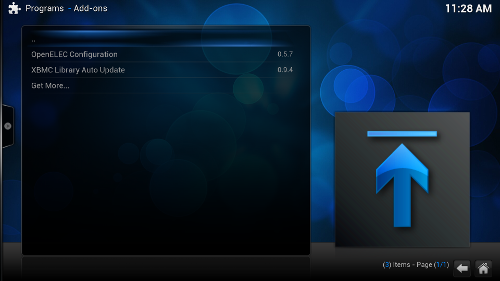
I searched but couldn’t find any way to get the changes to show up. There is a menu that comes up when you hit the left arrow that is supposed to update the library but it wouldn’t work for me. Since my UPnP servers can also serve files over SMB, I tried that and it not only fixed the issue but opened up a whole new level of coolness.

You can scan for TV Shows in your media files, and when you do Kodi will try to “scrape” information off of the Internet for such things as artwork and episode synopsis. You have to have your library named in a particular fashion (which I do) but then it is pretty automatic:
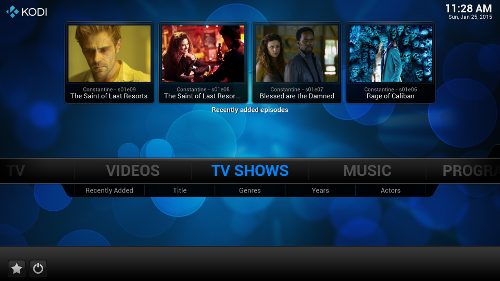
This didn’t happen when I was using UPnP.

This is all well and good, but I still get a lot of content through Over the Air (OTA) television broadcasts and the whole purpose of this exercise was to get that working. In order to add PVR functionality to OpenELEC you need to install add-ons. This usually consists of a “backend” application that does all of the heavy lifting with respect to video capture and encoding, and a “frontend” or client application that connects with the backend and displays the video. I specifically chose more powerful hardware as I wanted both features on the same unit.

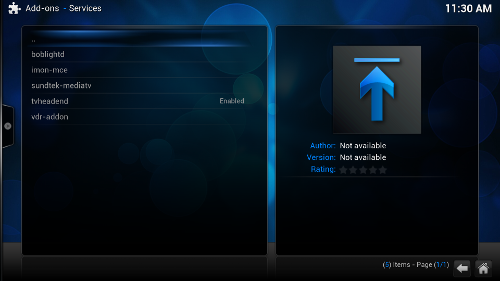
First I needed to install the backend, which is a piece of software called “Tvheadend“. It was a little hard to find in the menus as it is a “service” and not a normal add-on, so you have to find the “services” section of the add-ons menu:
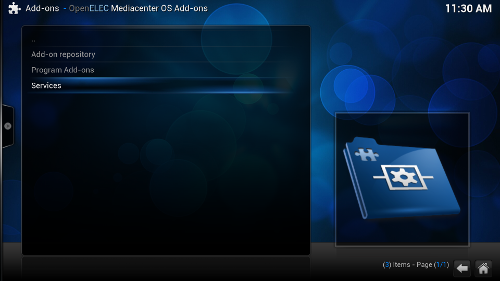
and then you can find and enable your services:
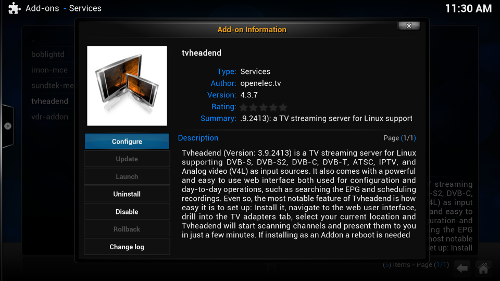
Like most add-ons within Kodi, you will have an “information” screen:
and a configuration screen:
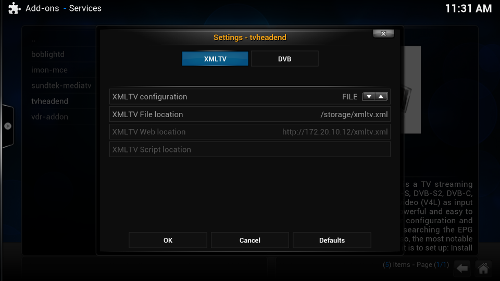
The configuration screen comes into play when you set up the Electronic Program Guide (EPG) but I’ve reserved that for a separate post.

To access the Tvheadend software, you have to browse to it via http://[openelec-server]:9981. That would be a different URL, of course, if you installed it on a server other than the OpenELEC box. This is where it got difficult as most of the documentation on-line is out of date and the menu options have changed. I’ll post what I did in the hope that it might help someone else out.

First, you want to go to the Configuration tab:
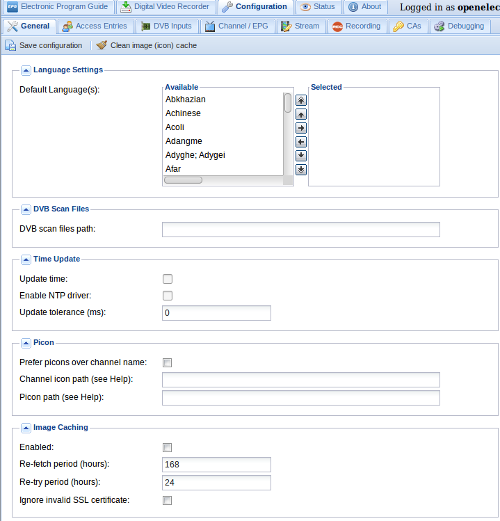
You don’t have to do anything on the “General” tab if you don’t want to, but you do need to see a TV capture device on the “DVB Inputs” tab:

If you have chosen a supported capture unit, it should be displayed here. If not you’ll need to either figure out why it isn’t or get another unit. My Kworld UB435-Q showed up with support for both DVB-C and ATSC formats. Since I am interested in OTA broadcasts in the United States, I chose to enable the ATSC interface as the other is used for cable, which I don’t have.
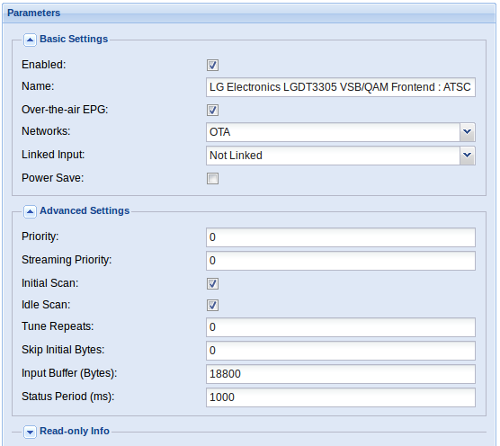
Note in this screenshot that there is a Network entry called “OTA”. This was not there when I first enabled the interface. I had to go and set it up on the “Networks” tab and then add it.

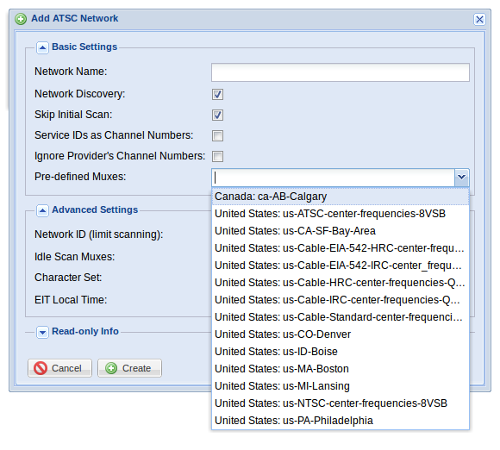
This took me a rather long time to figure out. You need to tell the Network what multiplexers to use, and it looks like you would need to add them individually under the “Muxes” tab. It turns out that there are a number of pre-defined muxes including one for North America ATSC called “United States: us-ATSC-center-frequencies-8VSB” so I just chose that for my “OTA” network:
Once I associated it with my adapter in the “DVB Inputs” tab, I had a list of television channels:
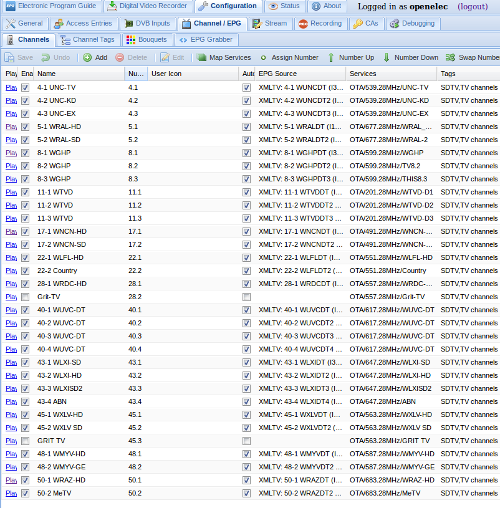
Tvheadend is pretty cool on its own. If you notice on the screenshot there is a “play” button next to the channel name and if you click it you get a stream that will play on your computer. We recently had a bad weather day and I worked from home, and I was able to keep the local news up in a window while I worked. I haven’t really explored all of the features of Tvheadend, but once I got to this point it was time to head back to OpenELEC and set up the frontend client.

Going back to the configuration menu and looking through the Kodi add-ons, there is a section called “PVR Clients”:
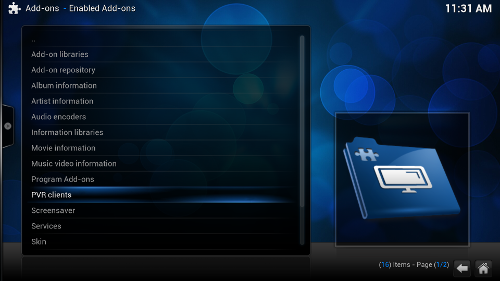
I wanted the Tvheadend HTSP client:
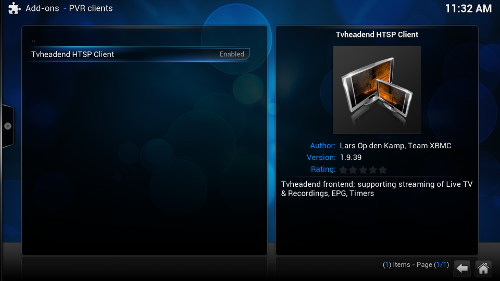
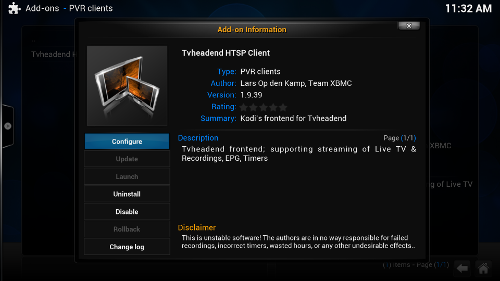
Just like the backend, there is an information screen:
and a configuration screen:
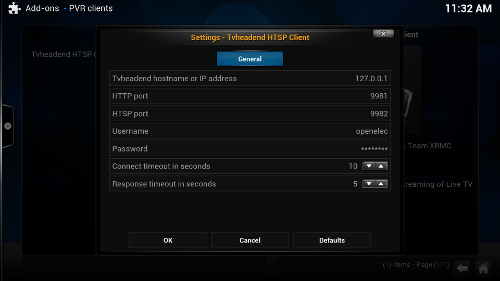
In this configuration screen, you have to point to the Tvheadend backend, which in my case is on localhost.

If you get to this point, then you should see a new “TV” menu item:
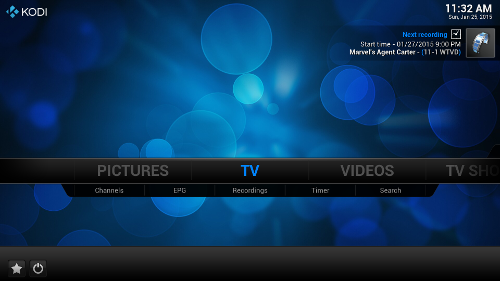
You can watch live TV:
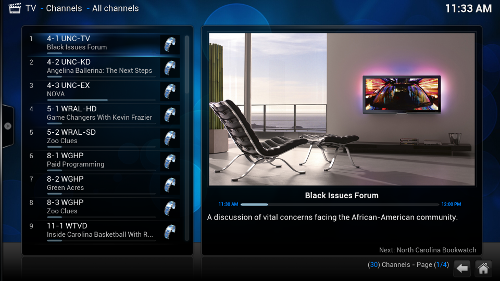
But the main reason I wanted a PVR was to time shift and store TV programs so that I could a) skip the commercials and b) make sure I didn’t miss anything. This requires access to the Electronic Program Guide and I could not figure out how to get it to work. I spend days worth of my limited free time working on this. The forums and the existing documentation were not much help.

I got so frustrated that I based the system and installed Mythbuntu – an Ubuntu-based distribution that focuses on MythTV in the same fashion OpenELEC focuses on Kodi. I figured that since MythTV was designed to be a PVR from the start, it might be easier.

There were a number of differences apparent right away. Mythbuntu is huge compared to OpenELEC. It includes a number of things that just aren’t required. It was, however, easy to install, and building on my newly earned knowledge with OpenELEC I was able to navigate the initial setup easily. I found that the MythTV documentation was slightly better than OpenELEC/Kodi/Tvheadend, but I still hit snags.

The first was that MythTV wouldn’t recognize the Kworld tuner I was using. It did, however, see the EyeTV tuner from my Mac-based install. But using it and having it scan for channels turned up nothing. The channel scan seemed to complete as expected but nothing was discovered.

I spent another day’s worth of free time trying to get that to work, but I gave up pretty easily. I wanted to use the Kworld tuner and possibly sell the EyeTV unit, so it bothered me that it wasn’t recognized. Plus, Mythbuntu just wasn’t the lightweight install I wanted, so I decided to go back to OpenELEC.

I did finally get the EPG working, but I’m going to reserve that story for the third and final post in this series. Once that happened I could see the guide in OpenELEC:
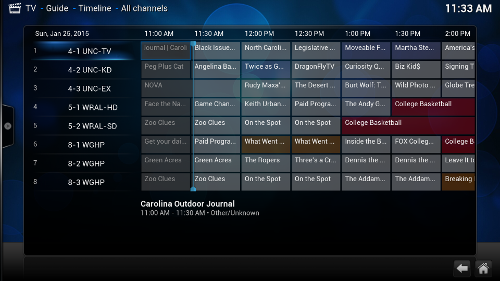
Yay!

Is it perfect? No. The OpenELEC TV frontend is pretty limited. While I can schedule a show for recording through the EPG by setting a “timer”, I have not found a way through the GUI to record a whole series. I can do it through the Tvheadend web interface by selecting the show in the EPG and choosing “Record Series”:
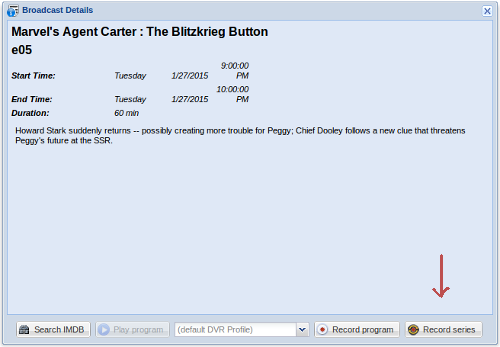
and then it will show up on the “Timers” section of OpenELEC:
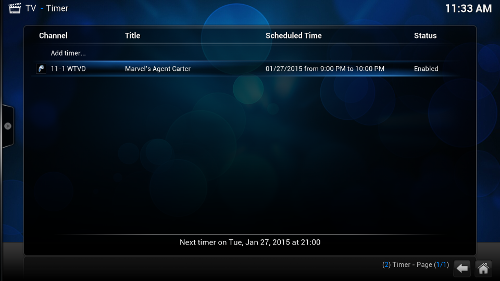
You can access saved recordings through the menu as well:
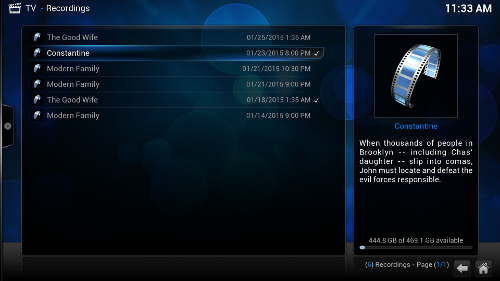
but it frustrates me that there doesn’t seem to be a way to delete the recording once I’ve seen it. I have to do that through the Tvheadend web page.

(sigh)

Overall I’m happy with my new OpenELEC Kodi install. There are a large number of add-ons that I haven’t explored yet, and perhaps I’ll have the time one day. When I was younger and got a new piece of technology I would try out every single feature. Now I tend to do the bare minimum I need to have a viable solution and then stop. (grin)

If you don’t care about OTA television then OpenELEC is a breeze to set up. The only issue I see is that there are a number of closed solutions, such as Google’s Chromecast and Amazon’s FireTV that do pretty much the same thing, at least with respect to video, and they cost about as much as a nice meal versus several hundred dollars.

But I like OTA television. Between it and other services I have like Netflix and Amazon Prime Instant Video, I always have something to watch. Plus, OTA HDTV signals aren’t compressed like those from cable and satellite providers, so the quality is excellent.

This experiment to create an open source PVR both emphasizes the good and the bad about free software. I consider myself pretty technically savvy but I had a lot of issues getting this to work. But I also learned a whole lot about four open source communities (OpenELEC, Kodi, Tvheadend and MythTV) and how OTA television actually works. My PVR is not some magical black box but a tool that I can control and manipulate to my benefit.

Technology is key to personal freedom and ceding the understanding of how it works to third parties can be dangerous. I know it sounds silly to sow fear about something as trivial as the ability to record “The Big Bang Theory“, but rarely does societal change happen in a huge way all at once. It is more a series of small things, chipping away at our freedoms over time, and getting this to work just made me feel like, at least in my life, that I was making a difference.

Many thanks to the people behind OpenELEC, Kodi, Tvheadend and their communities for making this possible.
Building an Open Source PVR: Step One – Hardware

Many years ago I was jealous of my friends that had a TiVo. Since I live out on a farm and get my television the old fashioned way via an antenna, TiVo didn’t work for me. I was stuck with using a VCR to record my television programs.

UPDATE: My friend Tanner pointed out that TiVo does offer an Over the Air (OTA) option now. It runs $49.99 for the hardware plus a monthly charge of $14.99 (a “lifetime” option is available as well). Looks pretty cool and I’m sure it is easier to set up than what I did. If I wasn’t all about open source I would have seriously considered this.

Then I got introduced to a product called EyeTV. This is a product designed for OS X that looks like an old school USB stick with a coax connector at one end. Connect that to your antenna, plug the USB end into your Mac, install the software and, voilà, you have your own personal video recorder (PVR). The hardware is actually a Hauppauge WinTV HVR-980 but the secret sauce is the software to make it easy to use.

Note: it appears they don’t make that unit for the US anymore and instead sell an external unit.

The EyeTV setup works fine, but as I’ve moved away from Apple products I have been wanting to replace it with an open source PVR. There are a number of open source media suites, including Kodi (previously XBMC) and MythTV, and I’ll cover that in my second post. I decided to explore OpenElec, which is a lightweight packaging of Kodi, and since I could not find an “all in one” guide for setting something like this up, I wanted to document the process I went through in the hope that it will help someone else.

The first challenge was finding suitable hardware. I run EyeTV on a Mac Mini. It’s small and quiet and has enough horsepower to drive the EyeTV software at HD resolutions. But, it is a full operating system and has some frustrating issues. First, I use Front Row, which Apple dropped with OS X Lion. Next, it is connected to a UPS and when the power blips (which happens frequently on the farm) I get a little pop up on the screen that requires you to click “ok”, and that can’t be disabled. Almost every time I go to watch a program I have to dig out a wireless mouse just so I can acknowledge the dialog box. I wanted something that could be run entirely by remote and was as lightweight as possible.

Noise from the unit was a big consideration for me. If you want to do a lot of video processing you need a rather powerful machine, but those tend to need cooling and cooling means noise. To deal with this, most PVR software comes with the concept of a “frontend” or playback client that talks to a “backend” that actually acquires and manipulates the video stream. A lot of people have had success in using a Raspberry Pi as the frontend, but I wanted a unit that was both powerful enough to act as both the frontend and backend while not generating much noise.

Yeah, I know, first world problem.

The first unit I tried was the Z3RO Pro from Xi3. My friend Donnie works at WDL Systems and they specialize in embedded devices, so he tends to be pretty up to date on the latest new shiny and recommended I check it out. I ordered one from Amazon preconfigured with an SSD hard drive and 4GB of RAM.

It’s a very stylish and compact unit, and the one I bought came preloaded with SuSE Linux. It did have noticeable fan noise, however. Nothing too obnoxious, but in my quiet office I could definitely hear it.

That wasn’t a show stopper, but what did kill it for me was the fact that I couldn’t get it to talk to any of my HDMI devices. The Z3RO Pro comes with two video ports, one for DisplayPort and a combo DP/HDMI connection. You have to be very careful when putting an HDMI plug into that port as there is nothing to really guide the orientation (you put it in upside down) and if you force it in the wrong way you can damage it. I didn’t have a HDMI cable at the office, so I used an HDMI to DVI one and it worked fine, but when I got home the unit wouldn’t recognize the monitor with a straight HDMI cable. I tried three different cables and three different monitors and not even the boot screen would show up, so I had to return the unit. There is no audio out on the Z3RO Pro outside of HDMI and audio is a big part of this experiment.

The next unit I tried was the Intel NUC (Next Unit of Computing). This looks like a taller, smaller version of the original Mac Mini. It comes as a kit and you have to add your own storage and memory. Since my current setup has a 350GB HDD, I opted for a 512GB SSD and 8GB of Crucial RAM. The NUC also requires a mini-HDMI connection, so I bought a mini-HDMI to HDMI cable as well.

When the unit arrived, there was a cute little Easter Egg upon opening the box:

In addition to the computer hardware, I had to obtain a compatible TV tuner and a remote.

For the tuner I went with a Kworld UB435-Q, which is supported by OpenElec, and an Ortek VRC-1100 for the remote control. I didn’t really care about the remote itself as I have a Harmony 900 universal remote and my plan was to use it, but I needed an IR receiver and the Ortek was cheap.

I did manage to get this setup working well with OpenElec, but it wasn’t easy and I’ll cover the details in the next post. One funny thing I found was when I was programming the Harmony it appears that the NUC includes an IR receiver so the Ortek is unnecessary. You might be able to understand my confusion when the remote was working but the little red LED in the Ortek receiver wasn’t blinking. I ended up unplugging it and when I could still manipulate OpenElec I concluded that the NUC must have it. During this process, however, I ended up blanking my Harmony and I had to reconfigure everything, and at some point the NUC’s IR stopped working. Since I got it working with the Ortek’s receiver and I’m not in any need of extra USB ports, I kept it.

The cost of this experiment so far:

Intel NUC BOXD54250WYKH1 $351.00
Crucial MX100 512GB SATA 2.5″ SSD $213.99
Crucial 8GB Kit (4GBx2) DDR3 1600 $66.99
Kworld UB435-Q USB ATSC TV Tuner $24.99
Ortek Windows 7 Vista XP Media Center MCE PC Remote Control $16.96
AmazonBasics High-Speed A to C Type, HDMI to Mini-HDMI Cable $6.99
Total: $680.92

You can shave $100 to $150 off of that price by using a smaller SSD. The Intel NUC I bought also supports laptop-size HDDs, but if you plan to use an SSD and just want a smaller unit, there is an SSD-only version of the NUC that is a little smaller and a couple of dollars cheaper.

This is much more expensive than a lot of media players out there, and the main cost has to do with my requirement to capture live over-the-air digital television. For many people, this is an archaic concept (I was talking about this in the office and Ben jokingly asked “What’s a channel?”) and thus of limited value, but for those of us still using the old paradigm a PVR like this is useful.

Finally, while my NUC is based on Intel’s Haswell chip, they just announced that the Broadwell-based units will ship soon. In an ironic twist, they are being manufactured via a partnership with Xi3. As soon as that happens, you can expect the price of my unit to drop, so if you are considering a project like this, you have options.

And that’s what open source is all about to me: options.

♫ It’s Hard Out Here for a (Free Software) Pimp ♫

In thinking about a title for this particular screed, I almost went with “Papa’s Got a Brand New Phone” but that didn’t really encompass what I was after as much as a play on the Oscar winning “Best Original Song” by the Three 6 Posse.

When I first got involved in free software, I thought it was too good to be true. I thought “free” implied “no work” but I was confusing free (gratis) with free (libre).

Sometimes freedom takes work.

It takes effort and no small commitment to run as much free software as possible, and no where is that more evident than when it comes to choosing hardware.

I used to be a big Apple fanboy, and thus my personal technology decisions were easy: buy the newest shiny from Apple. When I decided to divorce myself from them, it took awhile to adjust to the fact that, quite frequently, the new shiny is not the best choice for a free software advocate.

But I’ve been stymied time and time again. When looking for a new laptop, I bought the latest Lenevo X1 Carbon and ended up sending it back. It was just too new to support my operating system of choice, whereas my old, second generation Dell XPS 13 “Sputnik” runs Linux Mint Debian Edition (LMDE) just fine.

So I tried a new tact.

When I was in the market for a new phone, I figured the best bet was to work backwards.

I had been using a Samsung Galaxy S3 running Cyanogenmod. However, right after I upgraded the baseband to run Kit Kat, the phone would constantly and randomly reboot. I tried everything I knew of to fix it and tried out just about every major ROM there was but it would still crash. Only by running Jelly Bean could I mitigate the issue somewhat. Then instead of bouncing every hour or so, it would only reboot once or twice a day.

Now I play a game called Ingress … a lot. It is a heavy user of the display, the CPU, the network and the GPS. While these reboots might have been acceptable to a casual user, they were killing me. While I may have somehow corrupted my S3, it was probably due to some other hardware problem, so I decided to get a new phone.

One of the pluses about putting in the time to use free software is quite frequently you learn how things work. I would never have even known about baseband versions, bootloaders, recovery, etc. if I hadn’t played with my phone. I also get a lot of options, such as which ROM to run. In all my research I decided that my philosophy matches up best with the team behind OmniROM.

OmniROM doesn’t have as many options as, say, AOKP, but they are dedicated to keeping it as open as possible and I admire that. Plus they have a pretty decent OpenDelta update application that makes staying on the latest release pretty simple.

Once I decided that I wanted to run OmniROM, I just worked backwards to pick out a phone.

Here’s where I had to make a choice about freedom.

What I loved about my S3 was that it had a replaceable battery and a microSD slot. Some days I’m a heavy user of my phone and even the best phones can’t last the day on a single charge. The microSD slot made it easy to transfer data from my phone to my computer as well as easily and cheaply expanding the available memory.

Not many phones have these two features. In fact, the only modern phones I could find were both from Samsung: the S4 and the S5.

The S5 is not supported by OmniROM, so my choice was simple: get the S4. I ordered an unlocked S4 from Amazon and got ready to enjoy the new-ish shiny.

It was not to be.

While the description on Amazon said that it was “unlocked” it turns out that Samsung has decided to block third party bootloaders, even on the S4, with an update issued last November, so it is impossible to replace their default operating system with a free one. While there are some ways to “dual boot” the phone, this was unacceptable to me, so I sent it back with the reason “item did not match web site description”. Just being carrier unlocked is not enough to merit the term “unlocked”.

In looking over the remaining options, I ended up settling on last year’s HTC One (m7). And I do mean settle: the One has no microSD slot nor does it have a replaceable battery. But these are things I can work around in the pursuit of freedom. I got a microSD to microUSB connector and an external battery pack that can keep my phone running for days. It also has a somewhat lo-rez camera at 4 megapixels, but it seems to take pictures just fine.

You do have to jump through an extra hoop in order to unlock the bootloader, but HTC made it pretty simple. You just have to log in to their developer site and post a code and they’ll send you back a file to run to unlock your particular phone. Not as easy as, say, a Nexus phone, but it isn’t too much extra work.

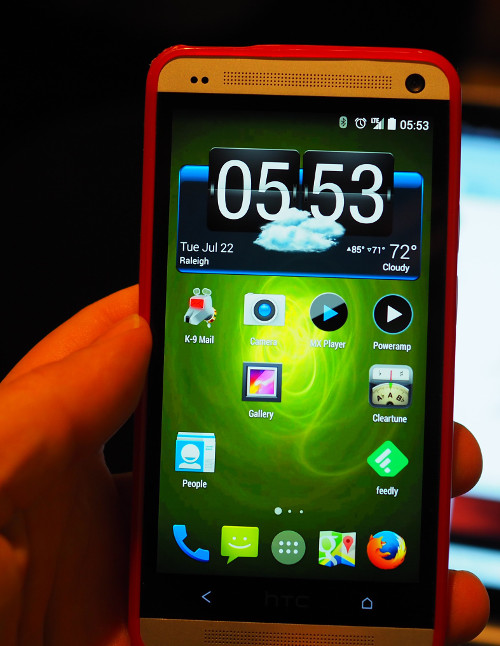
Now I have the latest Kit Kat running flawlessly on the phone. I’m able to remove the Google search bar, which in my case just takes up space, and I can modify the number of icons displayed per page.

It’s pretty awesome.

Is the HTC One a perfect phone, especially for playing Ingress? No – it is not perfect. But it is pretty darn good. At the Gettysburg anomaly it held up all day with zero reboots, whereas other people were reporting them with usually stable phones such as the Nexus 5. Note that if I didn’t have any other considerations I would have gotten a Nexus phone, but since I play Ingress with my spouse and she has one I wanted another brand in order to diversify the radio technology. In some places her phone gets signal where mine does not, and vice versa, and thus we can tether if needed.

I like to vote with my wallet and I buy products from companies that support freedom. I don’t understand why Samsung felt the need to lock down their devices. In part I think it is Apple-envy, but they just lost out to those of us who want to truly own their hardware. I’m not sure if it is enough to affect the bottom line, but it has soured me on Samsung products as a whole and I do buy a lot of technology.

So, remember that freedom takes work, but it’s worth it in the end.